I get questions about my microscope and photography setup every so often, and it’s about time I centralize this information. It took me a while to figure out a system that works for me, and now I have a set up that’s efficient for my workflow. I’ll cover my microscope, photo editing software, and organization in this post. I’ll also include costs where relevant. I don’t have a lab-grade set up, so this is all affordable to hobbyists and independent scientists alike. If you’re interested in a better photo stacking system, I recommend reading this blog post by Andrew Johnston at Purdue University. His system is more expensive, but will get you better results.
Microscope

My microscope setup. My compound scope is on the left, obscured by its dust cover. To the right is my Amscope microscope with attached ring light, connected to its own illuminator stand. I use the petri dish to course sort my samples processed with a Berlese funnel, and I use a pair of fine forceps to transfer specimens. Under the ring light is a small watch glass filled with a layer of hand sanitizer gel, covered by a thin layer of alcohol. Underneath the watch glass is a square of velvet for photography.
I have two microscopes: a dissecting scope (stereo microscope) and a compound microscope. I’ll only cover the dissecting microscope in this post, as it’s where I do the majority of my work. I purchased it from Amscope for ~$250 in October 2021; the microscope doesn't have a model name, but its SKU is SM-1BSL-V331. They still sell the same model, but now it’s $340. The optics on it have been great, I’ve never found myself regretting the purchase.
Relevant specs for the scope are as follows:
7X-45X continuous zoom magnification
Working distance (from bottom of objective lens to the stage): 4 inches (100 mm)
Field of view: ~1.25 inches (32.5 mm)
The biggest consideration I had when choosing a new microscope was the working distance. My old microscope had a very small working distance, which made it difficult to work with specimens bigger than one centimeter. This microscope’s field of view is great and solved my biggest complaint from my old microscope.
I only have minor nitpicks. One is that the microscope stage has two thin metal slide clips that are useless. If you want to look at a slide, you should use a compound microscope instead. I removed the clip arms, but am unable to remove the screws for them, which get in my way sometimes. (EDIT 4 Jan 2026: My good friend Curt Harden pointed out that you can remove the screws with a pair of pliers! Just pull up on them and jiggle them a bit and they pop right out. A game changer.) The rubber eye guards have a habitat of falling off when you remove the dust cover, so I taped them to the eyepieces with scotch tape.
Lighting is almost as important as the microscope itself. Along with the microscope, I purchased a 6 watt LED gooseneck illuminator that came with a ring light. The gooseneck lights are serviceable for when I need oblique illumination, but 98% of the time I’m using the ring light for my main light. The gooseneck lights are 6500K color temperature, which should be more blue, but compared to the ring light, they’re more yellow. Amscope doesn’t provide any info about the included ring light, but its color temperature appears a bit more blue. With regards to photography, the ring light is a pretty good neutral light, I have absolutely no complaints with it. Since it directly attaches to the objective lens, the light is close to the specimen and very bright. As for the microscope, the illuminator doesn’t have a model name, but the SKU is LED-11CR and is currently available for $193; in October 2021, I paid $163 for it. If you need a cheaper option, just buy a ring light from whatever retailer suits you. I did a quick internet search and it looks like options range from $30-$80. You’ll be fine with just the ring light.
CAMERA
I don’t have a dedicated camera for my microscope—I use my cell phone. It’s a Samsung Galaxy A71, which was released in 2020. The camera info, courtesy of Wikipedia, Samsung ISOCELL Bright (S5K)GW1; 64 MP, f/1.8, 26mm, 1/1.72", 0.8µm, PDAF. I hold my cell phone up to the camera eyepiece and take photos through it, adjusting the lighting on the phone. When I want to do focus stacking, I’ll take a series of photos through the eye piece at different focal planes by adjusting the course focus knob on the microscope. There are a variety of phone-microscope attachment adapters out there, and I own a few, but the A71 is too heavy/long to fit, so I don’t use one. I’m hoping that when I upgrade my phone, it will fit in one of my adapters better. Even though I don’t use an adapter, my photos turn out fine. I’m sure they would be better with an adapter, but not significantly. Probably would save me some time though!
Photographing the specimen
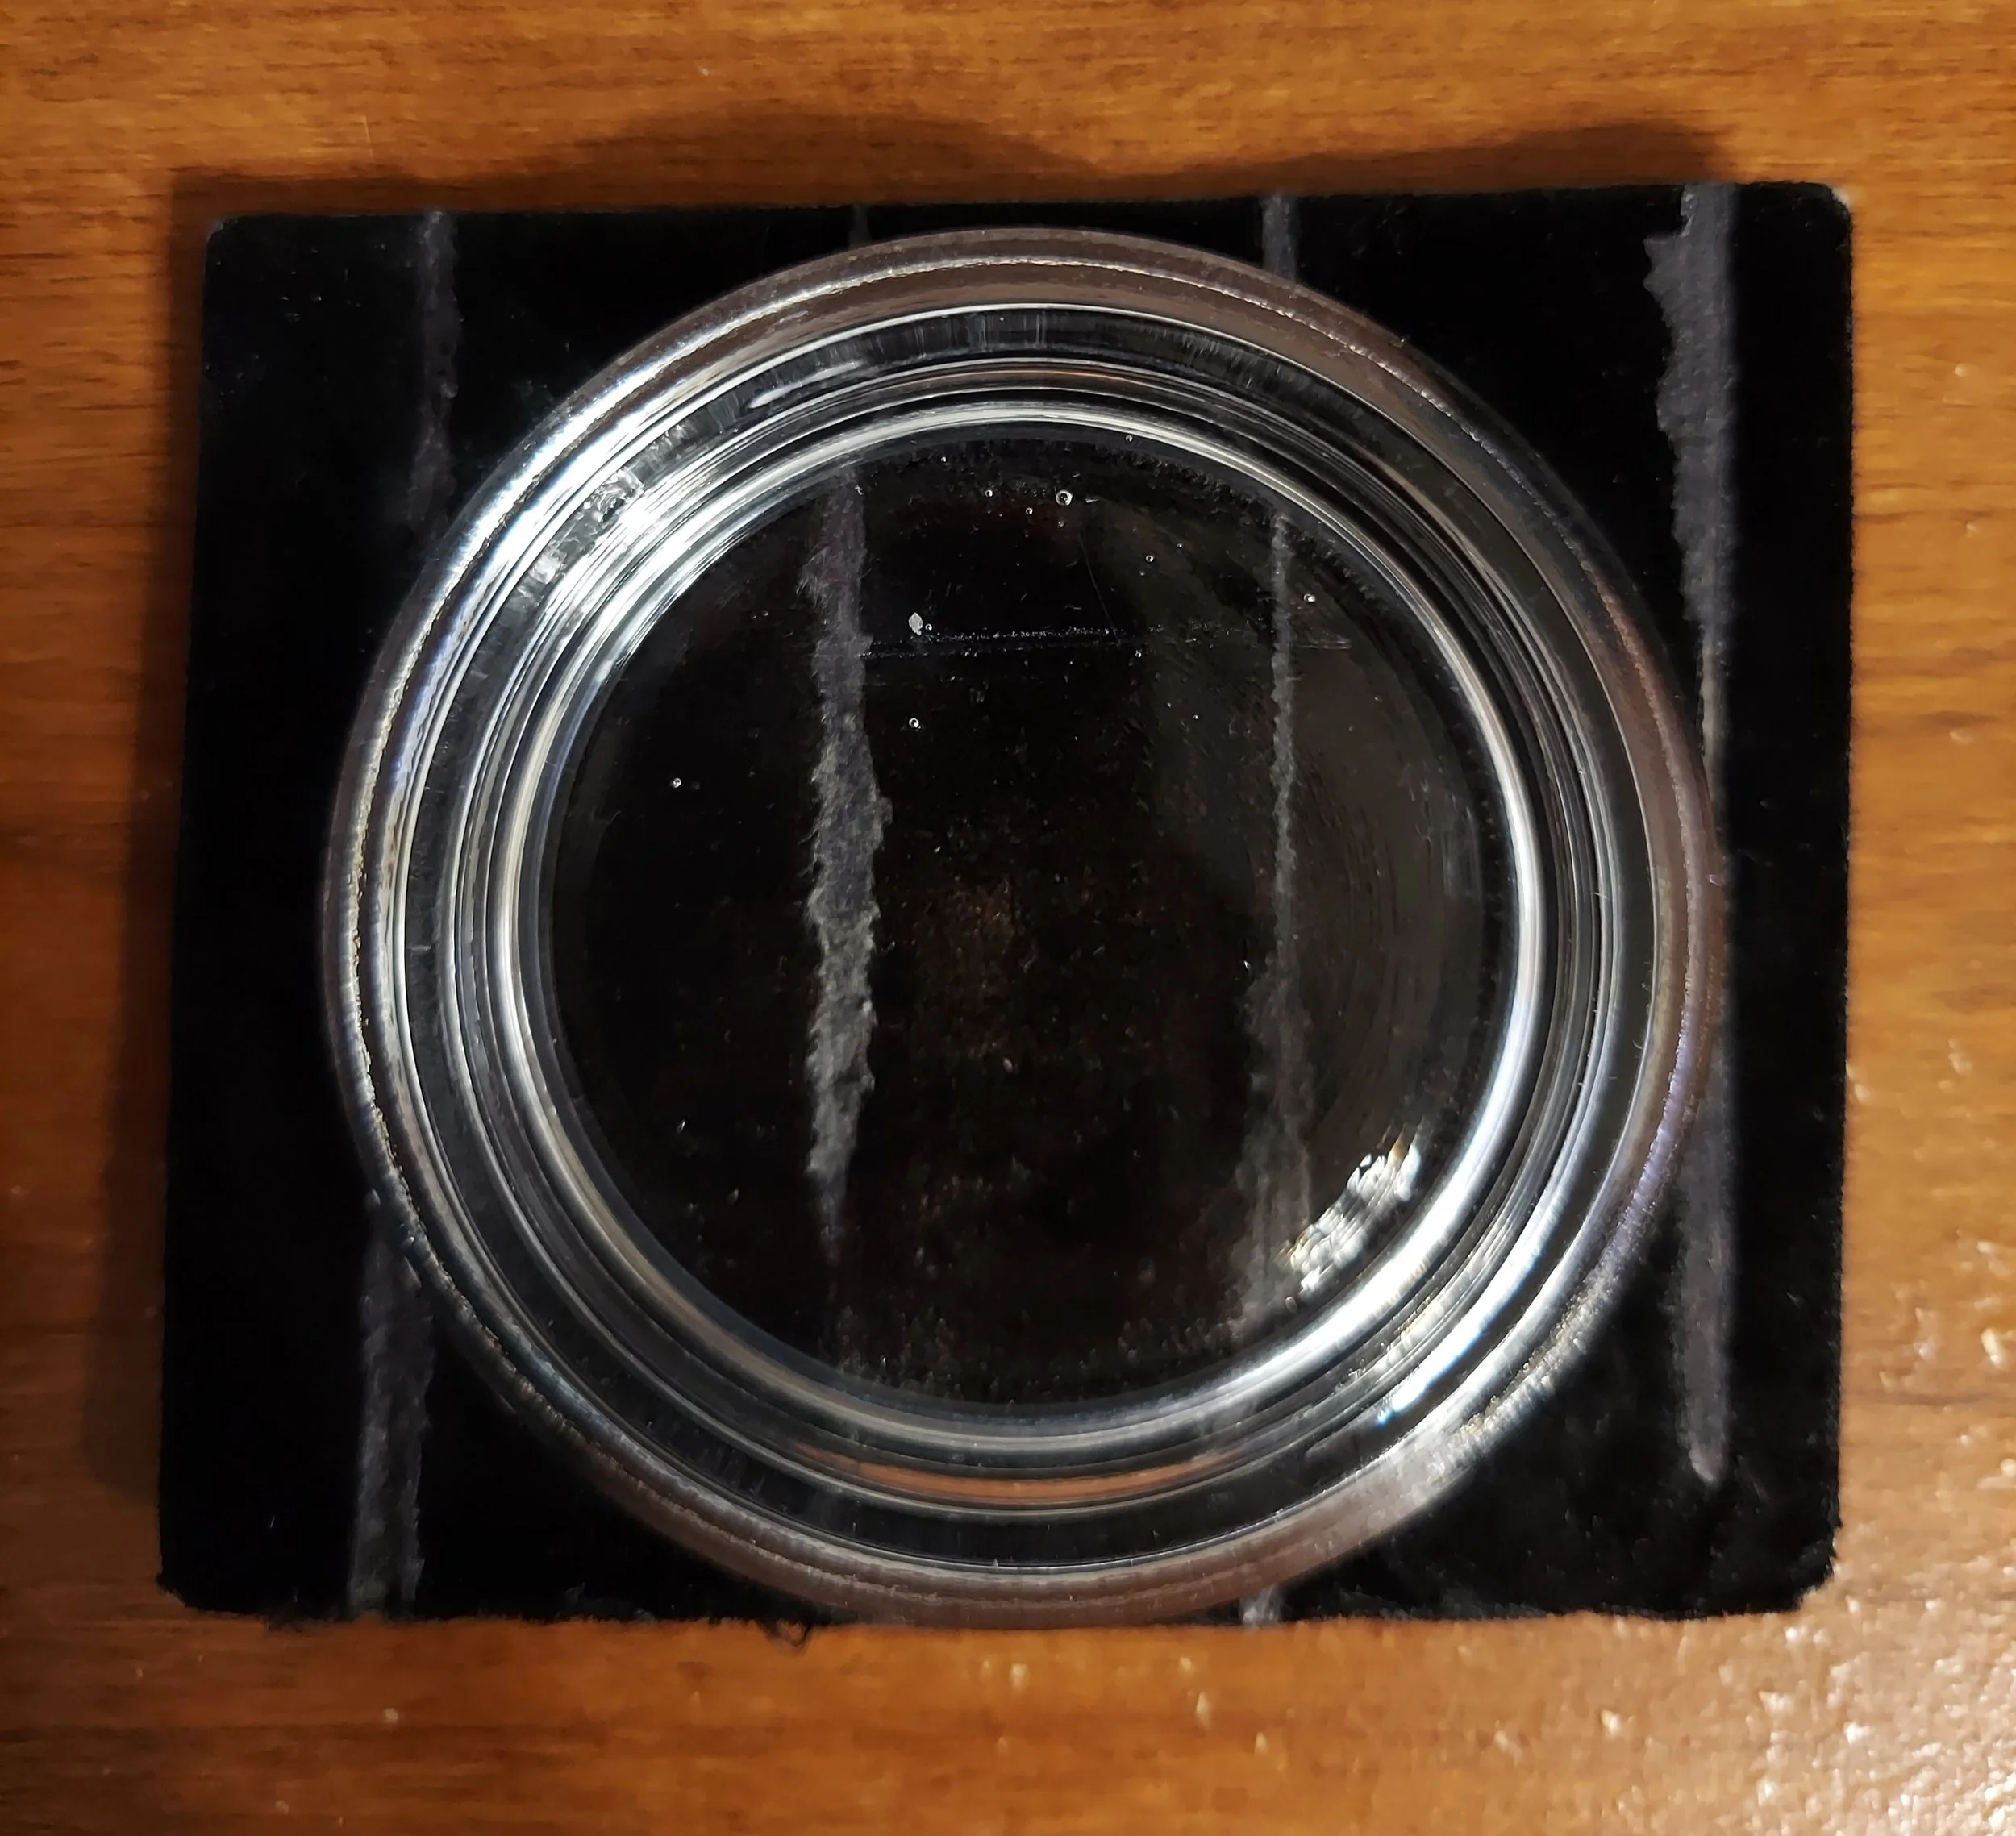
Watchglass filled with hand sanitizer and alcohol, sitting on a square of black velvet.
For photography, I place my specimen in a watchglass filled with hand sanitizer gel and covered with a thin layer of alcohol. The hand sanitizer holds the specimen in place so that it doesn’t move while you’re photographing it, and the alcohol on top keeps the hand sanitizer from drying out and becoming opaque. It’s very important that you pour the hand sanitizer from its bottle rather than pumping it or squeezing it, otherwise you’ll have small bubbles form and clutter your images. The bubbles at the top of the dish in the above image are because I pumped the sanitizer out of its bottle. You don’t have to use a lot of gel, just enough to hold your specimen in place. I pour a bit in, then move the watchglass in a circular motion to diffuse the gel through the dish before covering with alcohol. You also don’t need to add much alcohol, just enough to cover the gel and specimen. I use an insect pin or my fine forceps to move the specimen to different positions within the gel (dorsal, ventral, side view, etc.) for photography.
I use a square of black velvet underneath the watch glass to achieve a darker background than I can get from the microscope stage plate. Note that with most dissecting microscopes, the stage plate is white on one side and black on the other, allowing you to flip it around to achieve a desired contrast with your specimens.
Software and Organization
After taking my photos, I use two main software packages to edit them. For image stacking, I use Helicon Focus, which is a fantastic piece of software. You can download a 30 day trial version of the software to test it out, and if you like it, you can purchase a 1-year or lifetime license (check around the holidays for sales). If you purchase the lifetime license, all program updates are free. There are three versions of the software: Lite, Pro, and Premium. I recently upgraded from the Lite to the Pro version to take advantage of the retouching tools in the Pro version (some of which you can use a little bit in the Lite version). Image stacking in Helicon Focus is quick and easy; I’m usually stacking anywhere between 4 and 20 images of animals that range between 2 and 20 mm.
I import my photos into Adobe Lightroom to add tags (where the specimen is from, its catalog number, species identification, etc.) and finish photo editing. The settings I adjust are: color temperature and tint, exposure, contrast, highlights, shadows, whites and blacks, and sometimes clarity and rarely saturation. Photos taken with my phone tend to have the color washed out, so I might adjust the saturation in some photos to match the in-life color. I use a light hand with saturation (and contrast), as a little goes a long way. Otherwise, you risk making the photo look fake and oversaturated.
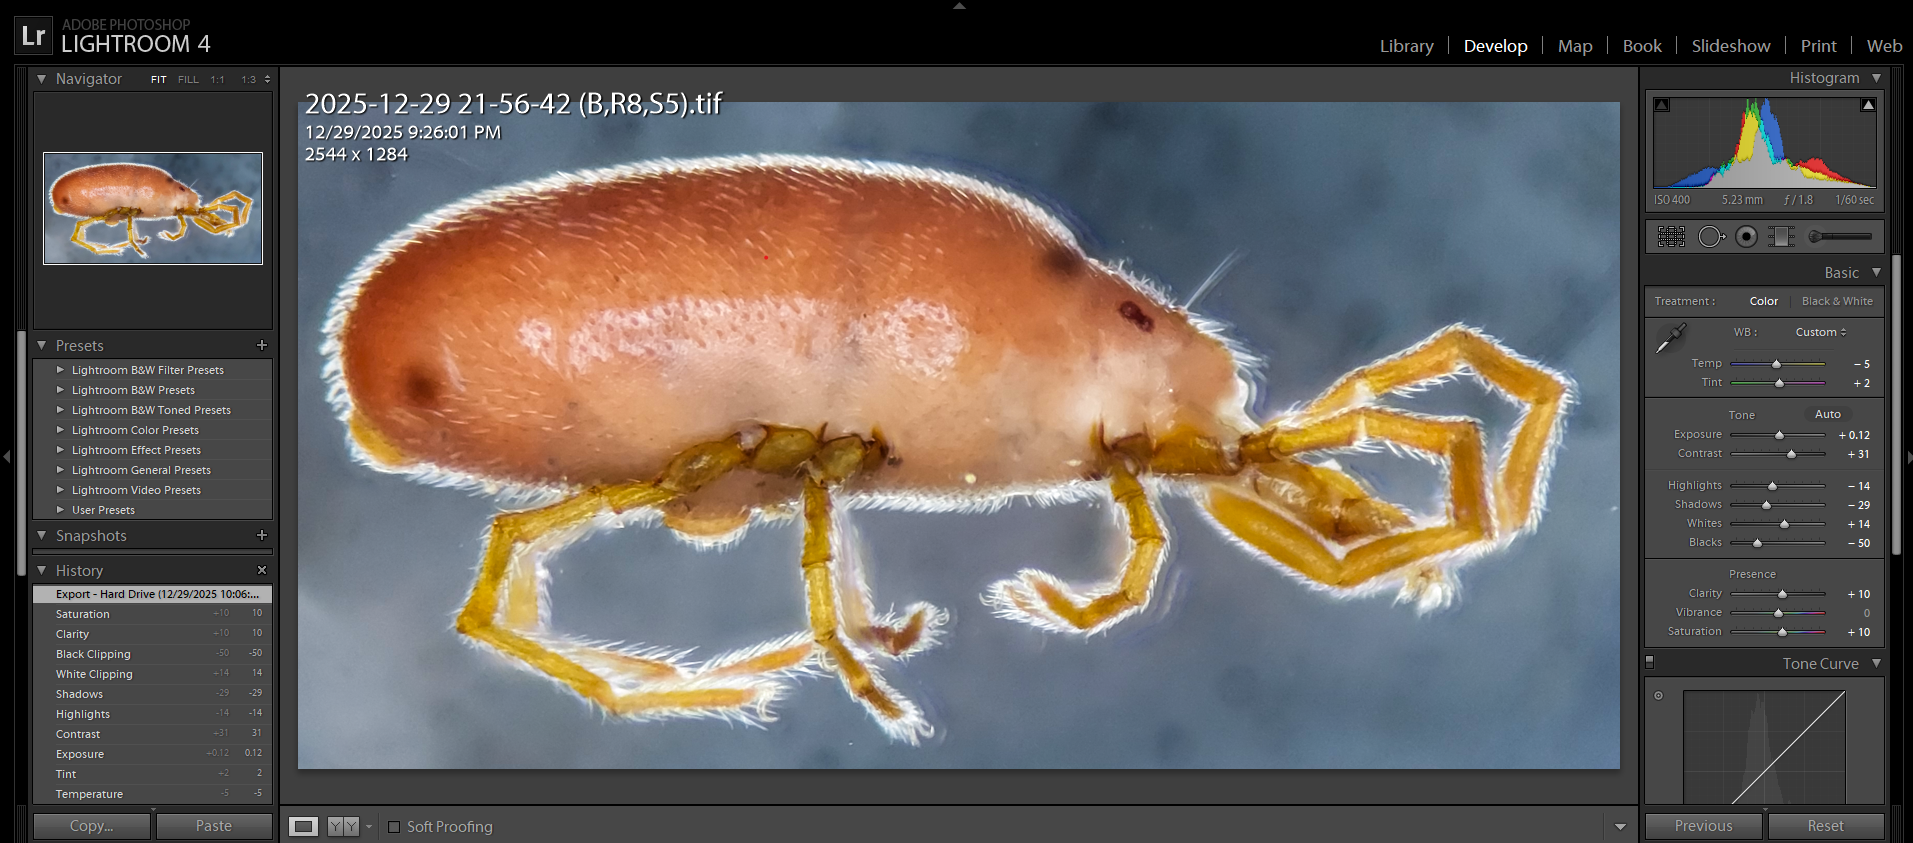
Screenshot of a photo of a mite (Family Tanaupodidae) after editing in Adobe Lightroom. This is edited after focus stacking in Helicon Focus. On the right side panel you can see the lighting and color edits I made to the image.
I also use the spot removal tool in Adobe Lightroom to remove small specks of dirt and other schmutz that accumulates in the watch glass. This cleans up the image and makes it nicer to look at.
PHOTOS
With all that said, here are the results of my process. If you want to see more, you can view my observations on iNaturalist to see other examples. I’m mostly photographing millipedes and centipedes, along with snails, mites, and other leaf litter critters.
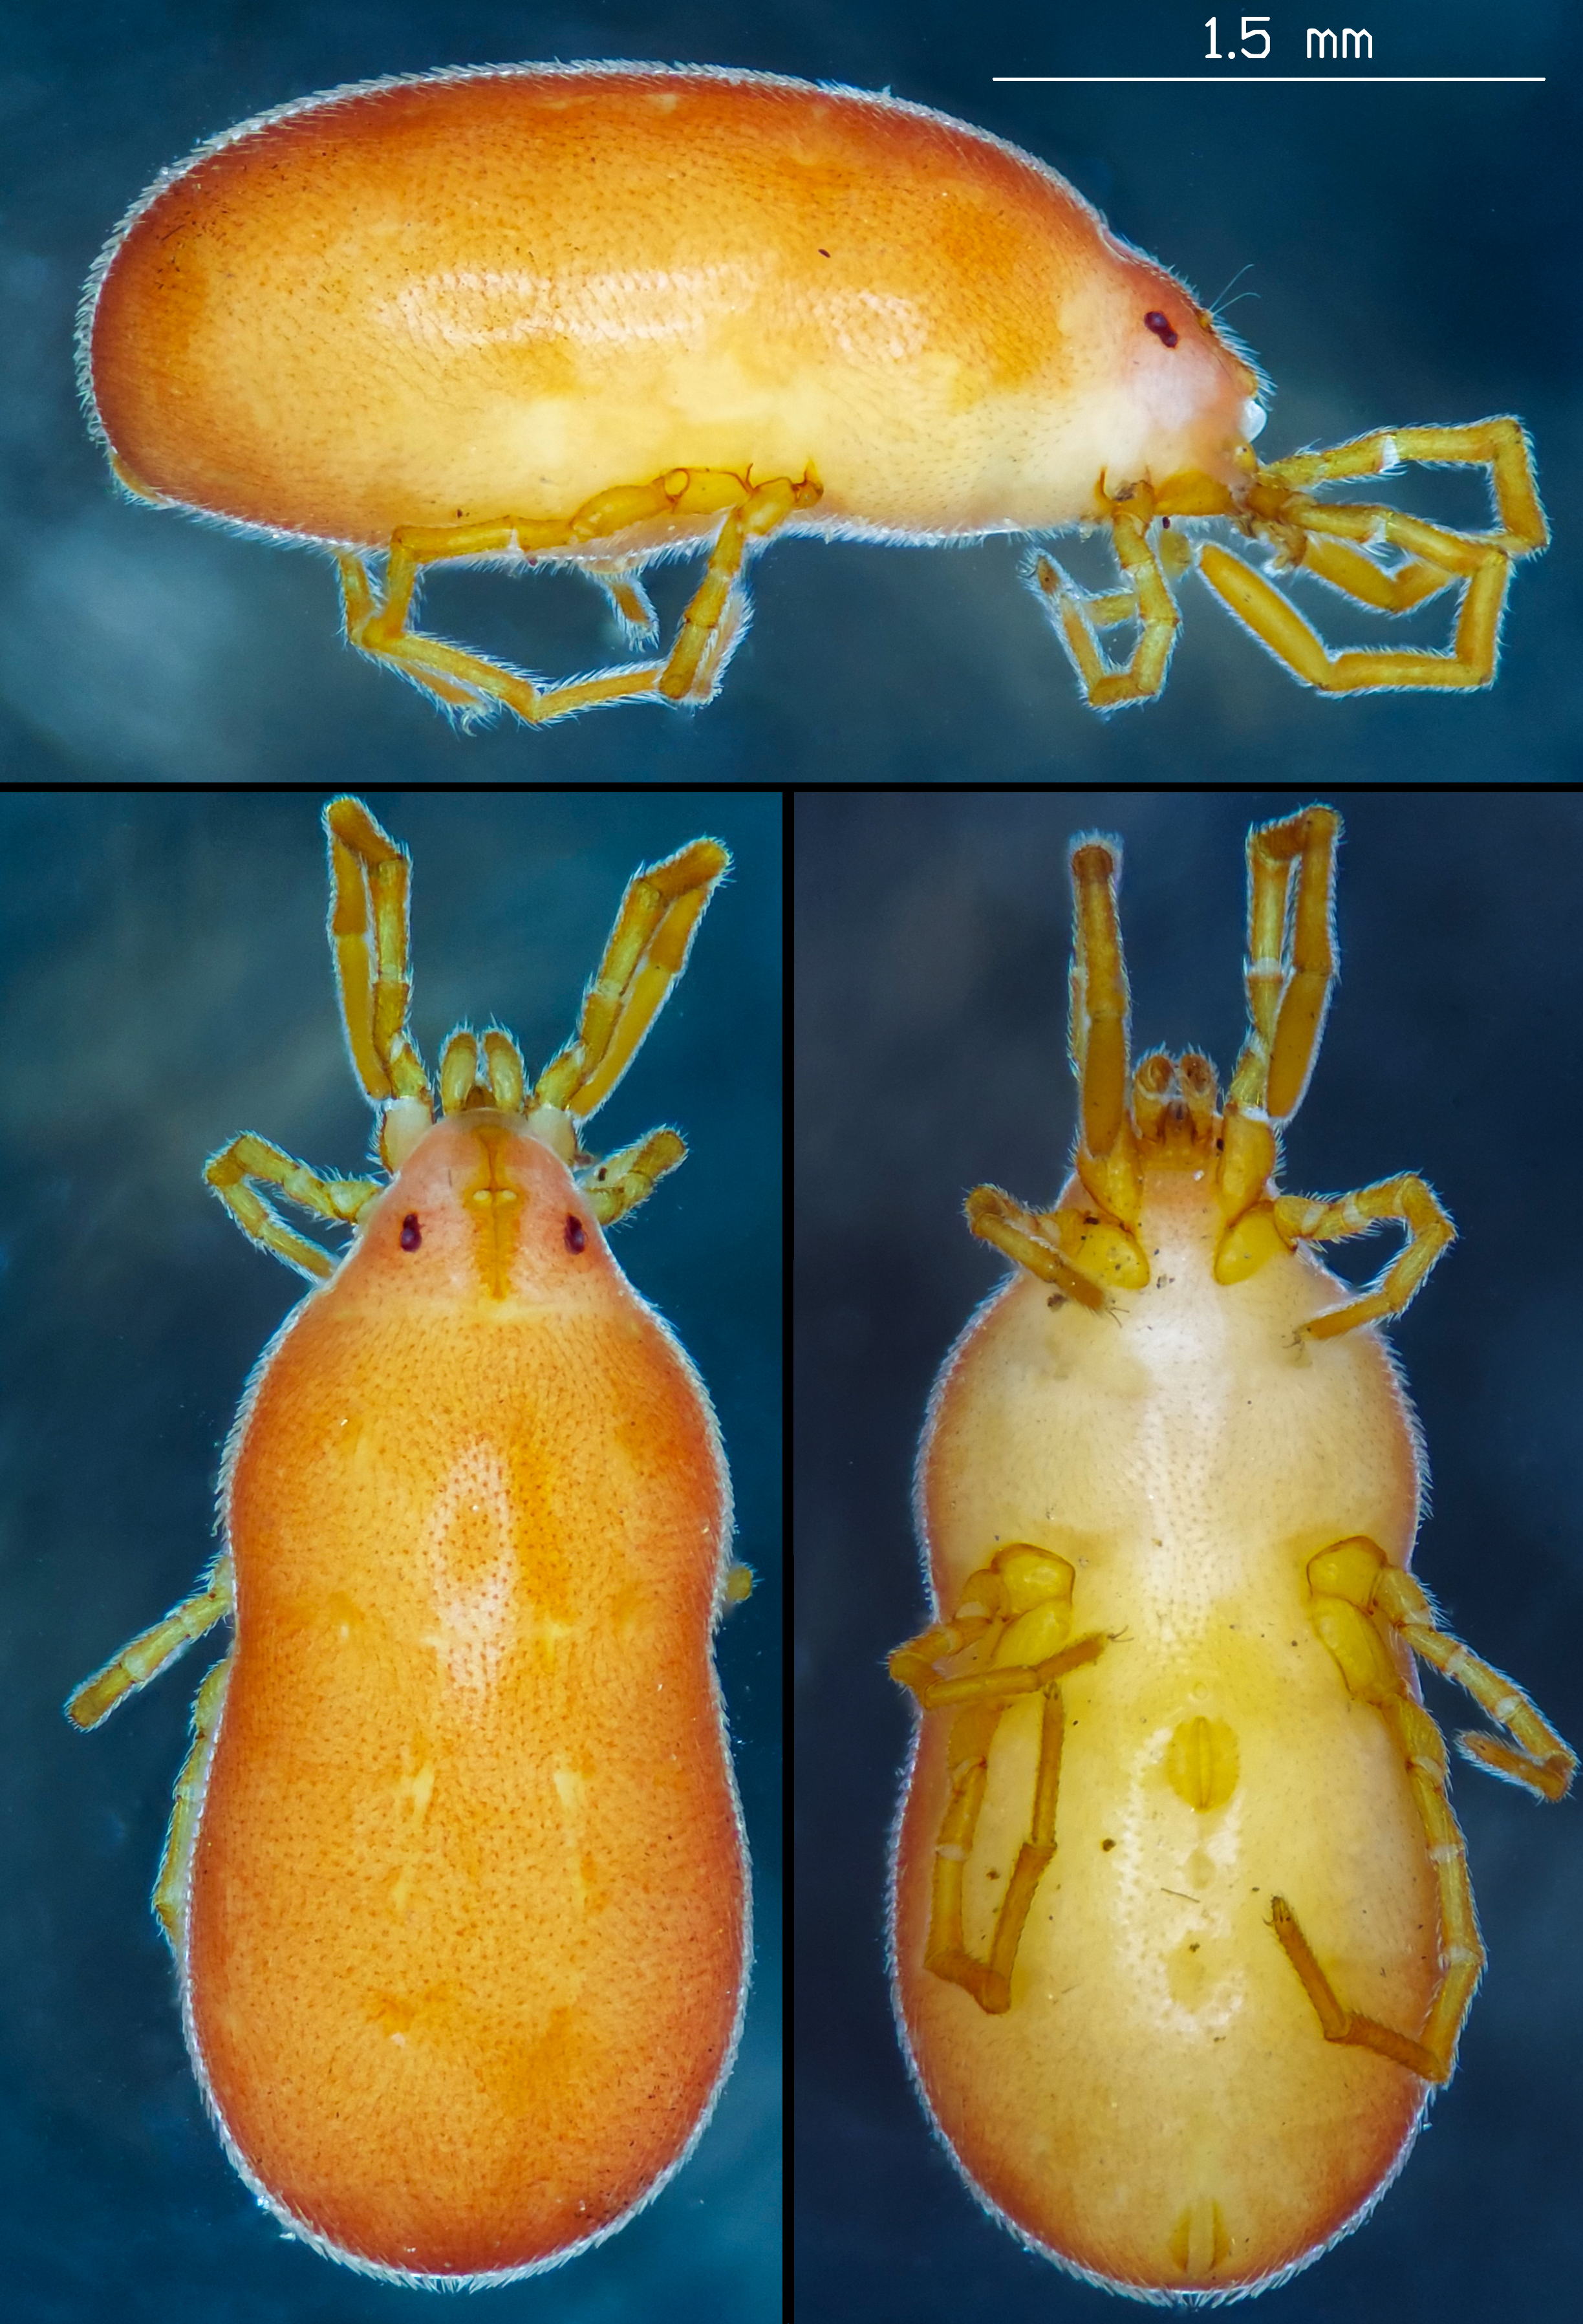
Mite in the Family Tanaupodidae. Collected Dec 2025 in Washington County, Ohio.
Uroblaniulus jerseyi (Julida: Parajulidae) from Chesterfield County, Virginia.
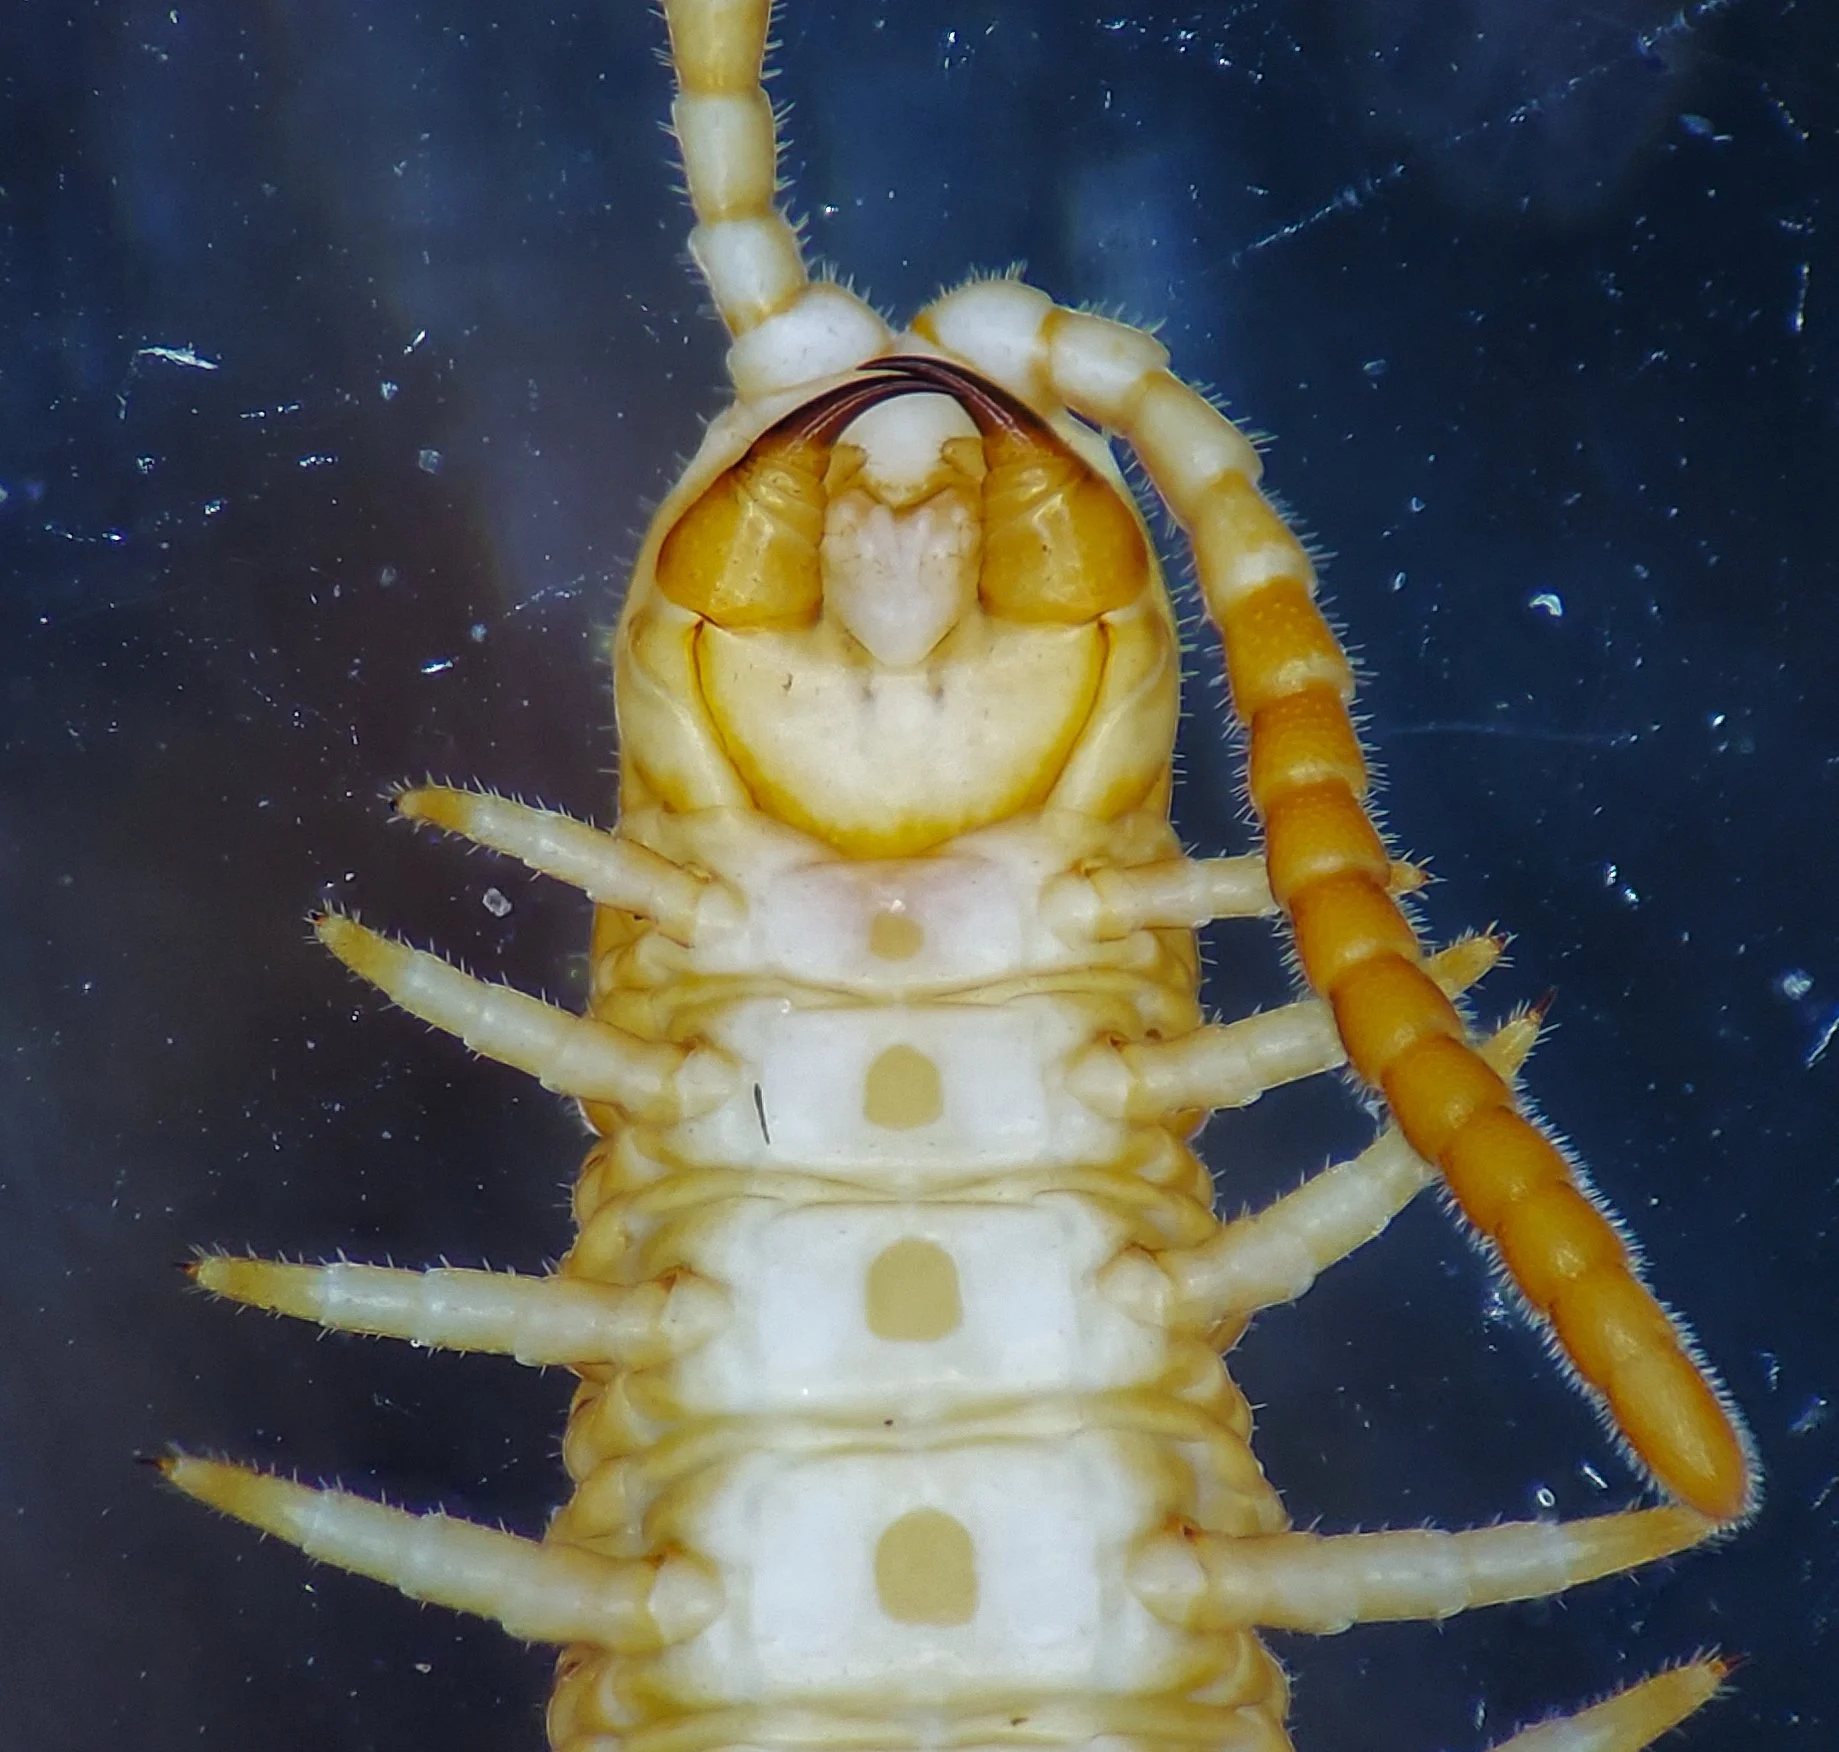
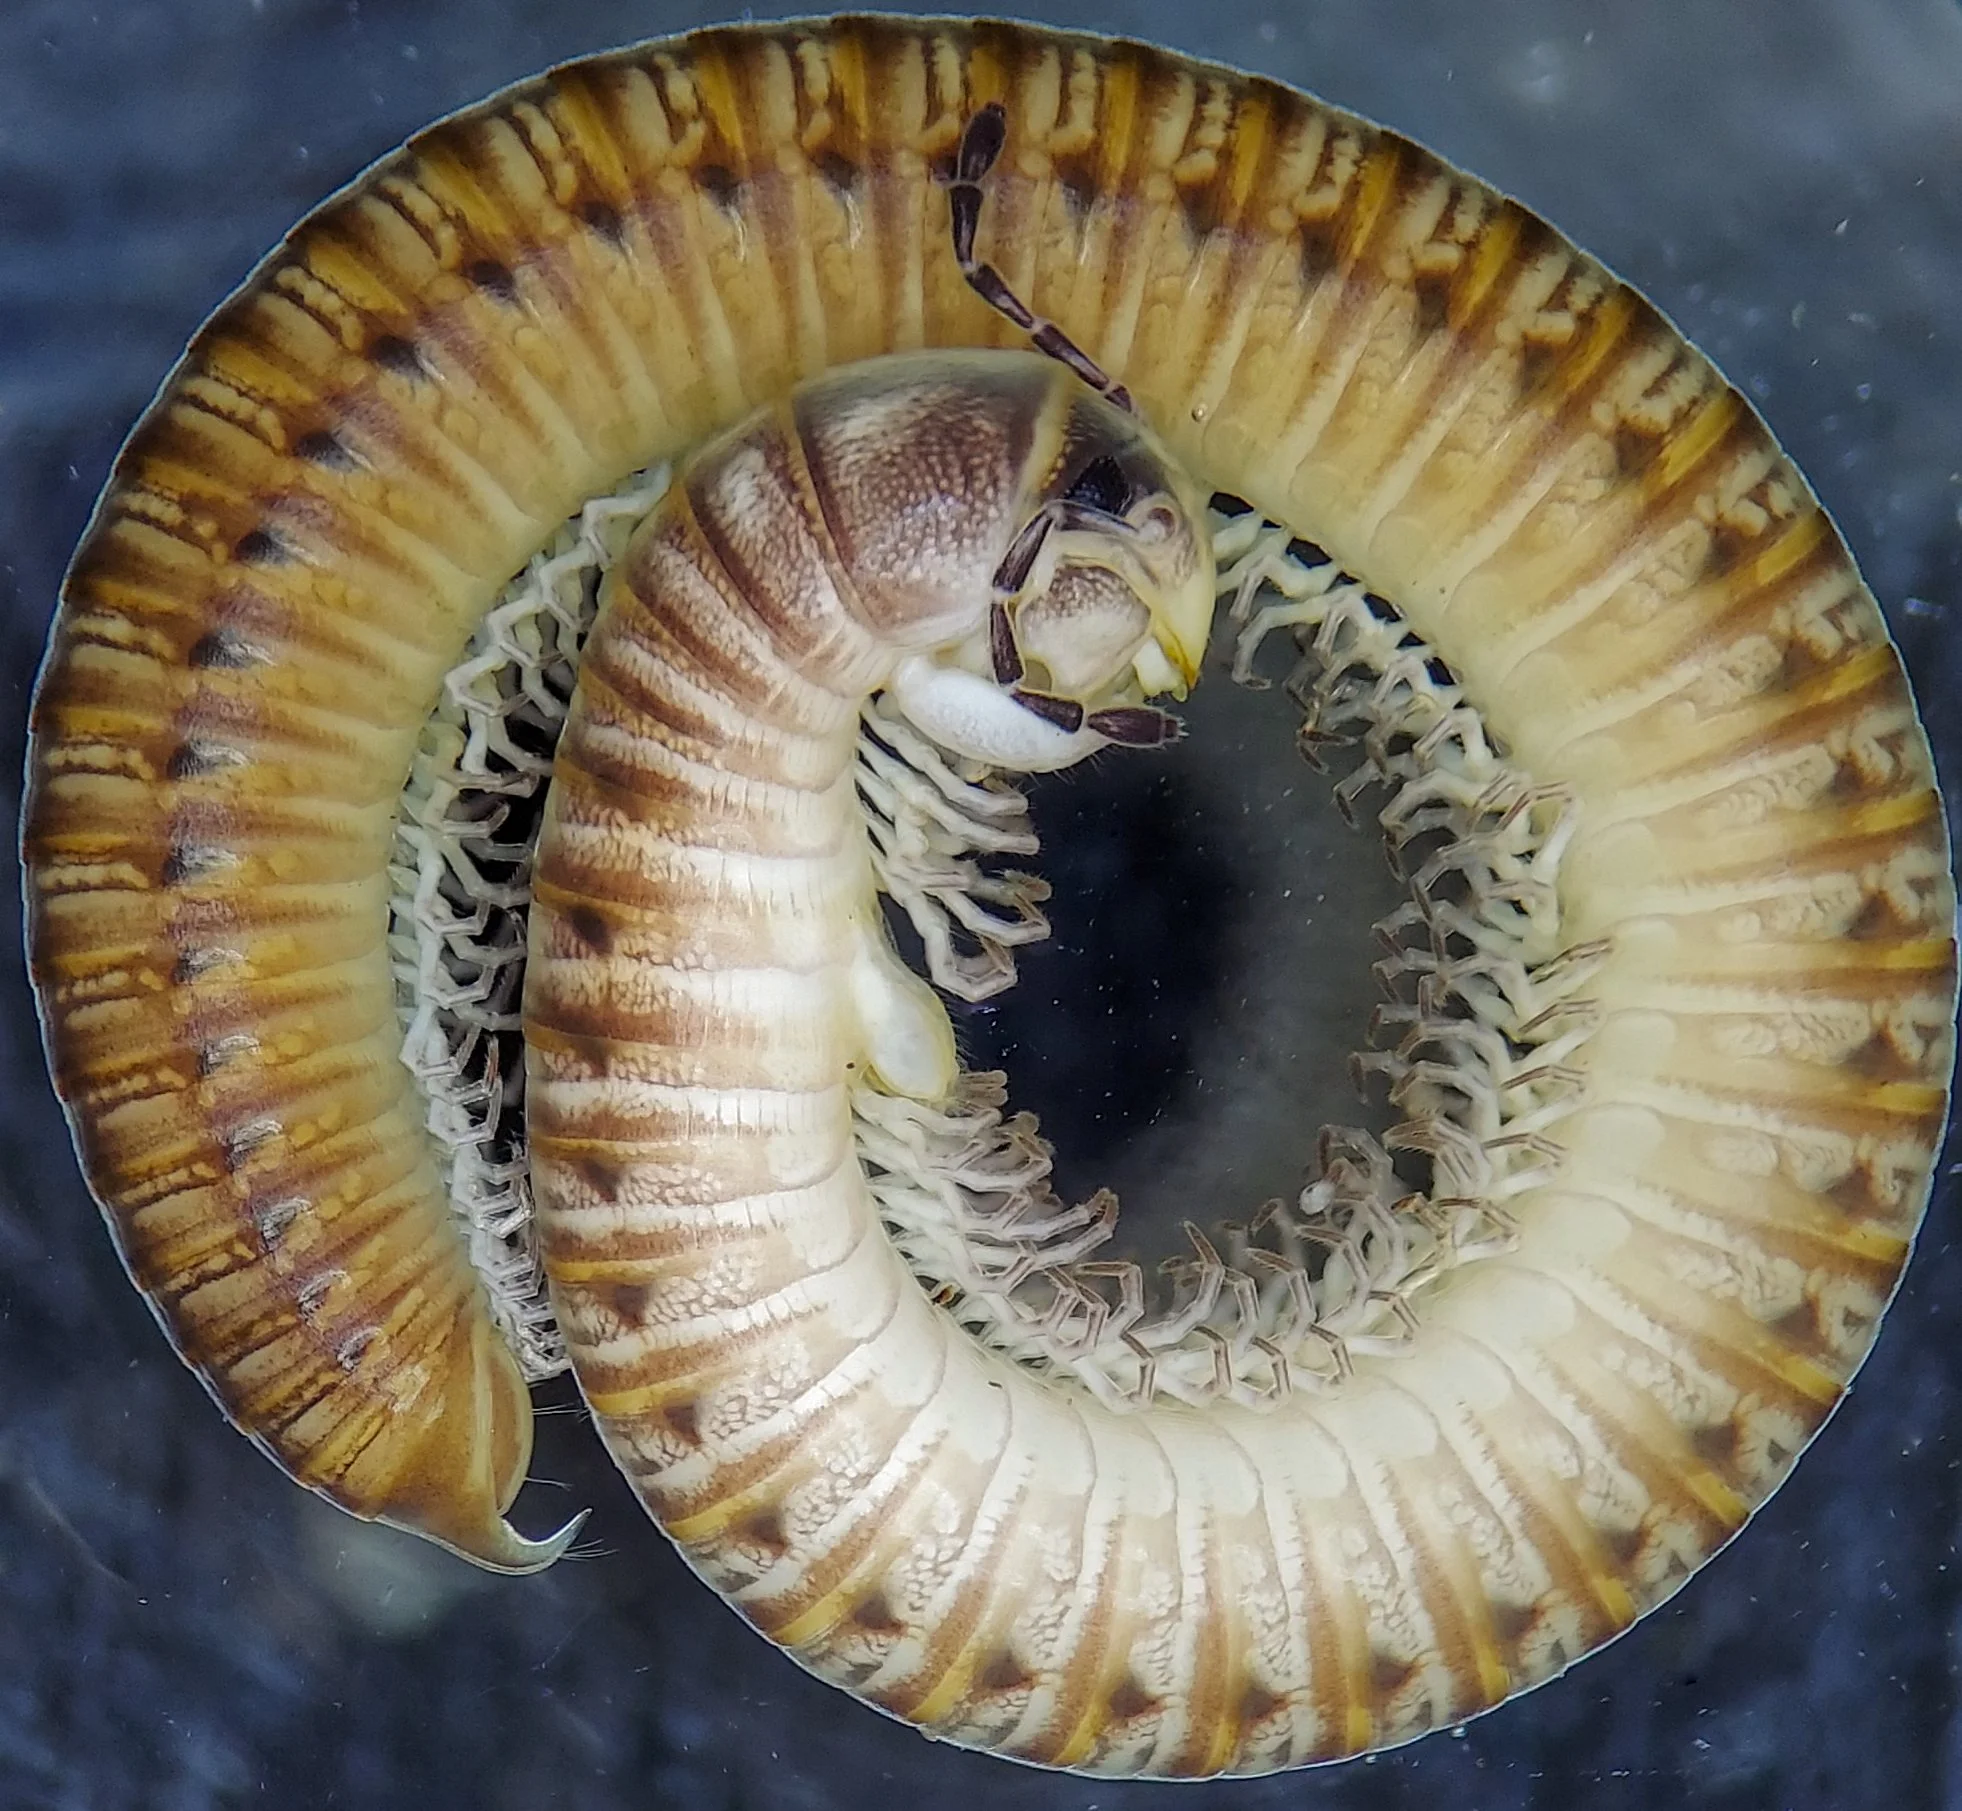
Ventral view of Henia vesuviana (Geophilidae: Dignathodontinae) from New York City.
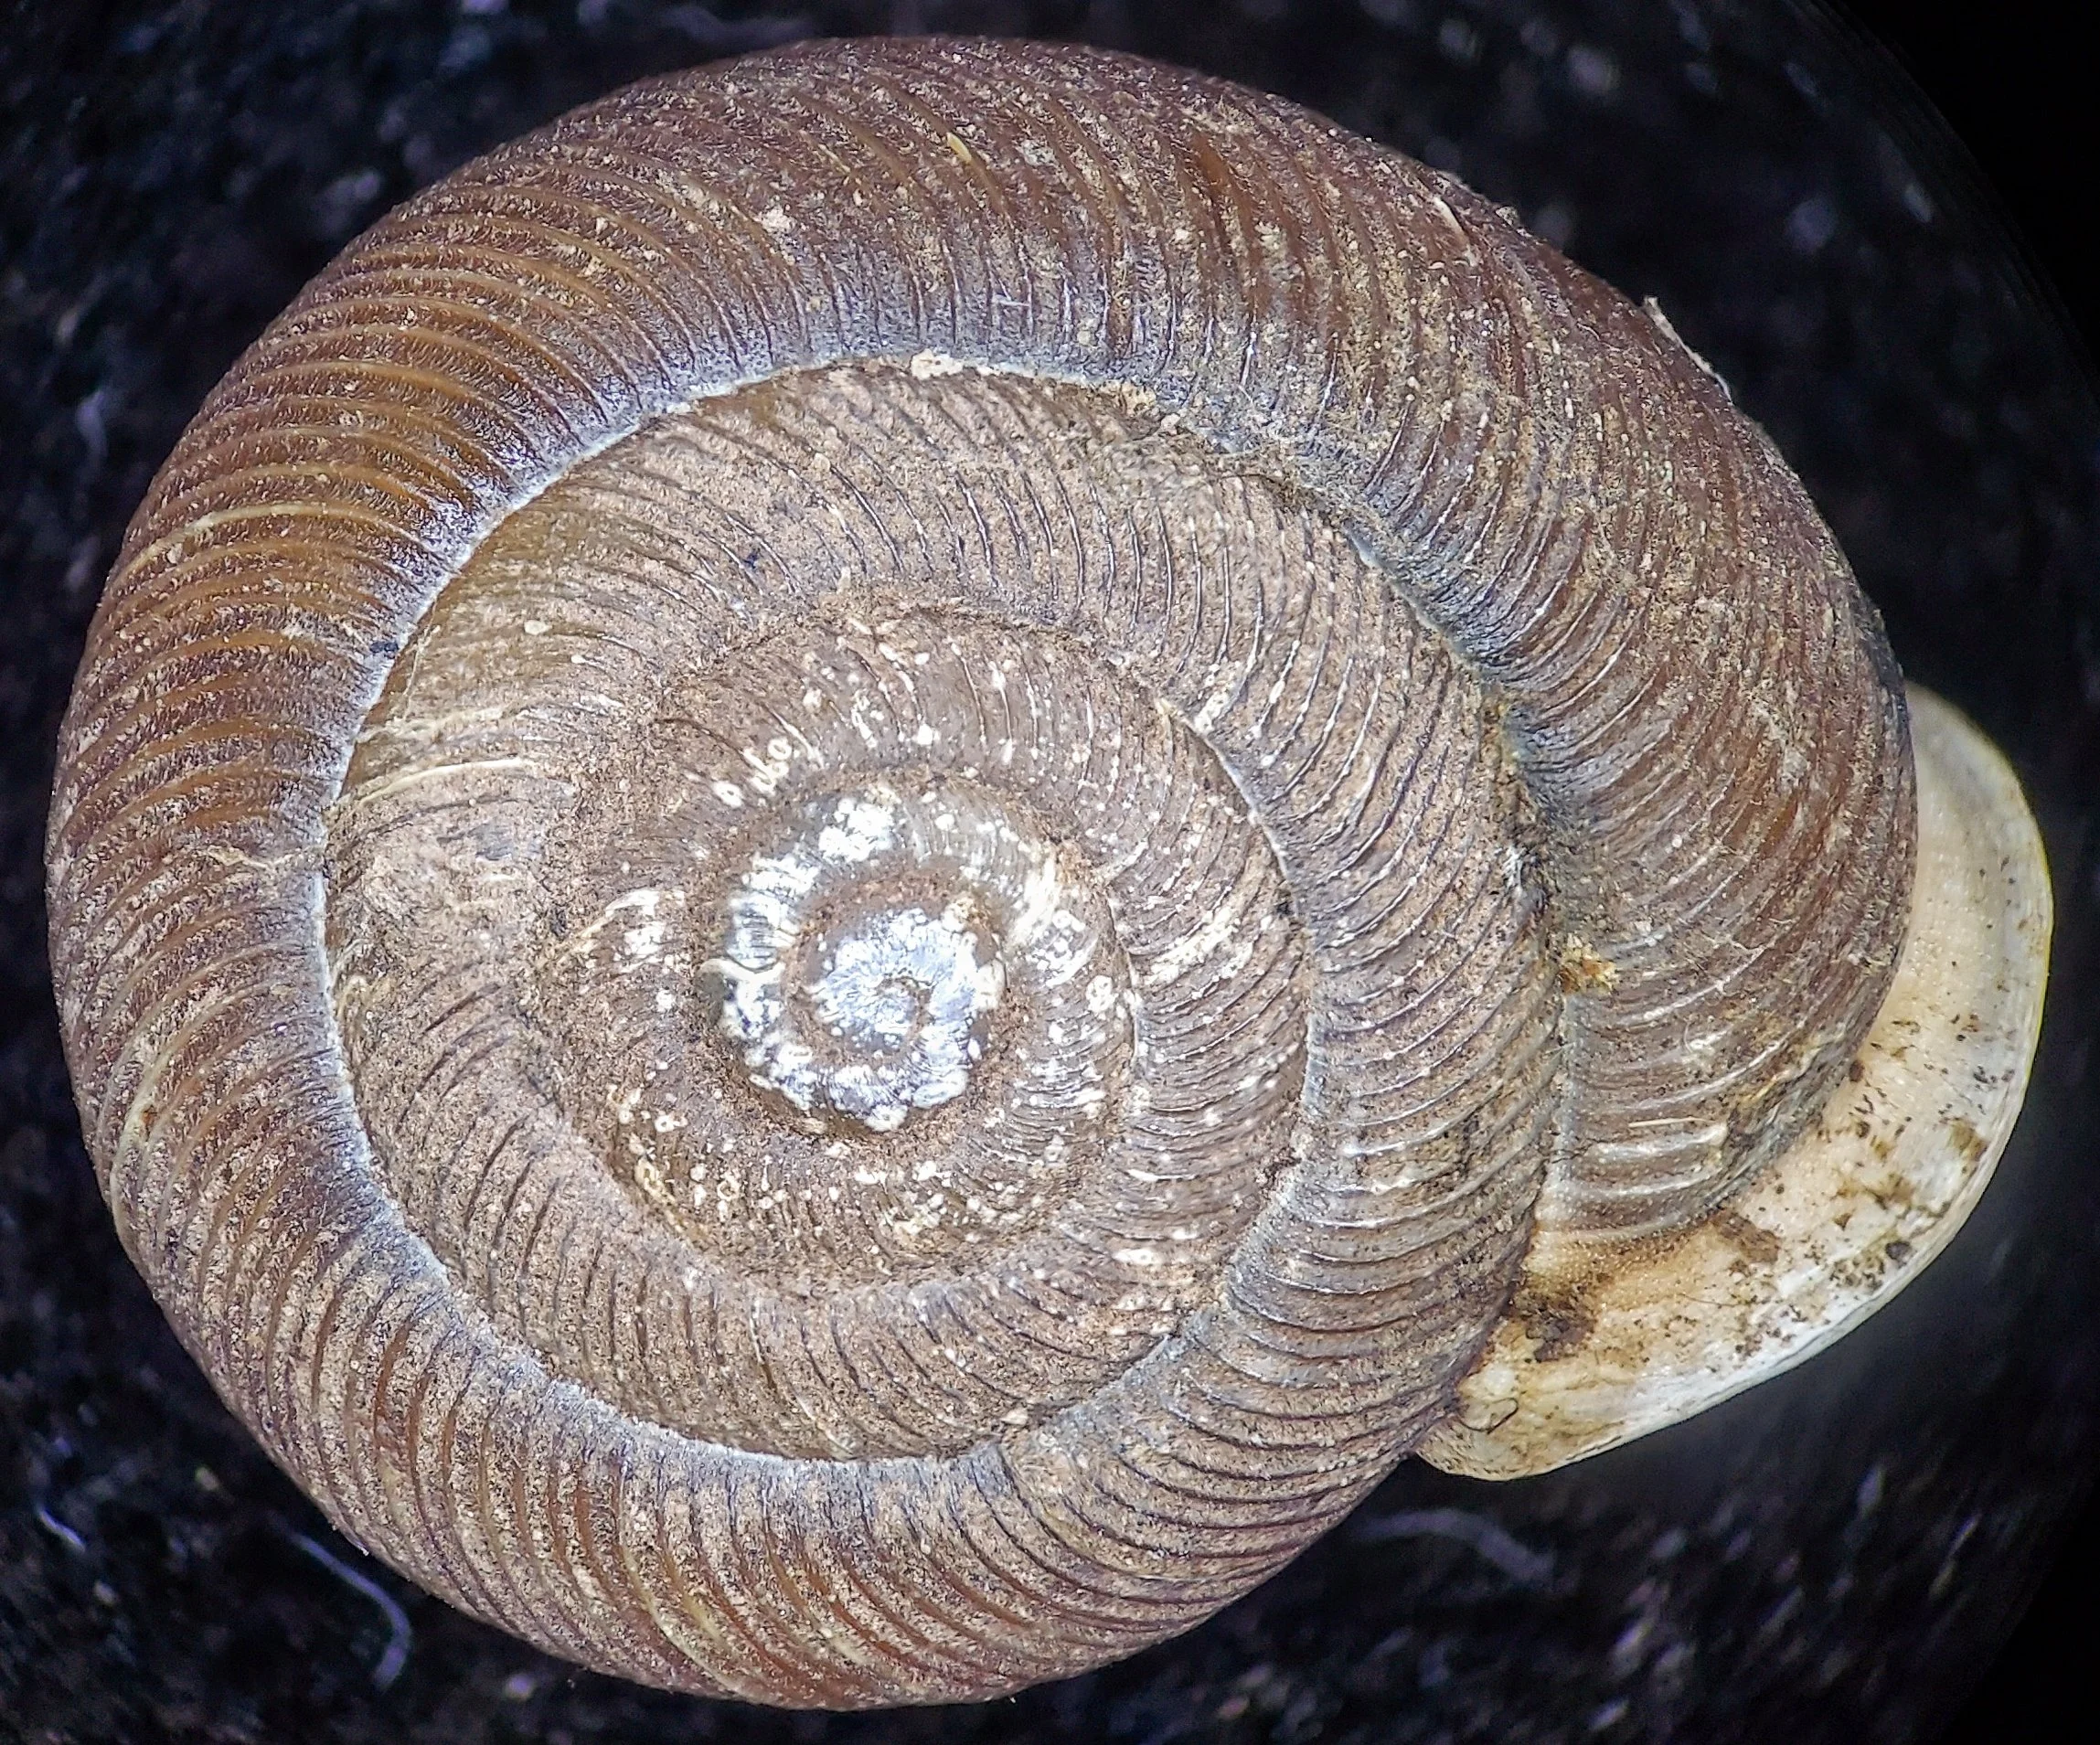
Dorsal view of Triodopsis sp. (Family Polygyridae) from Wythe County, Virginia.
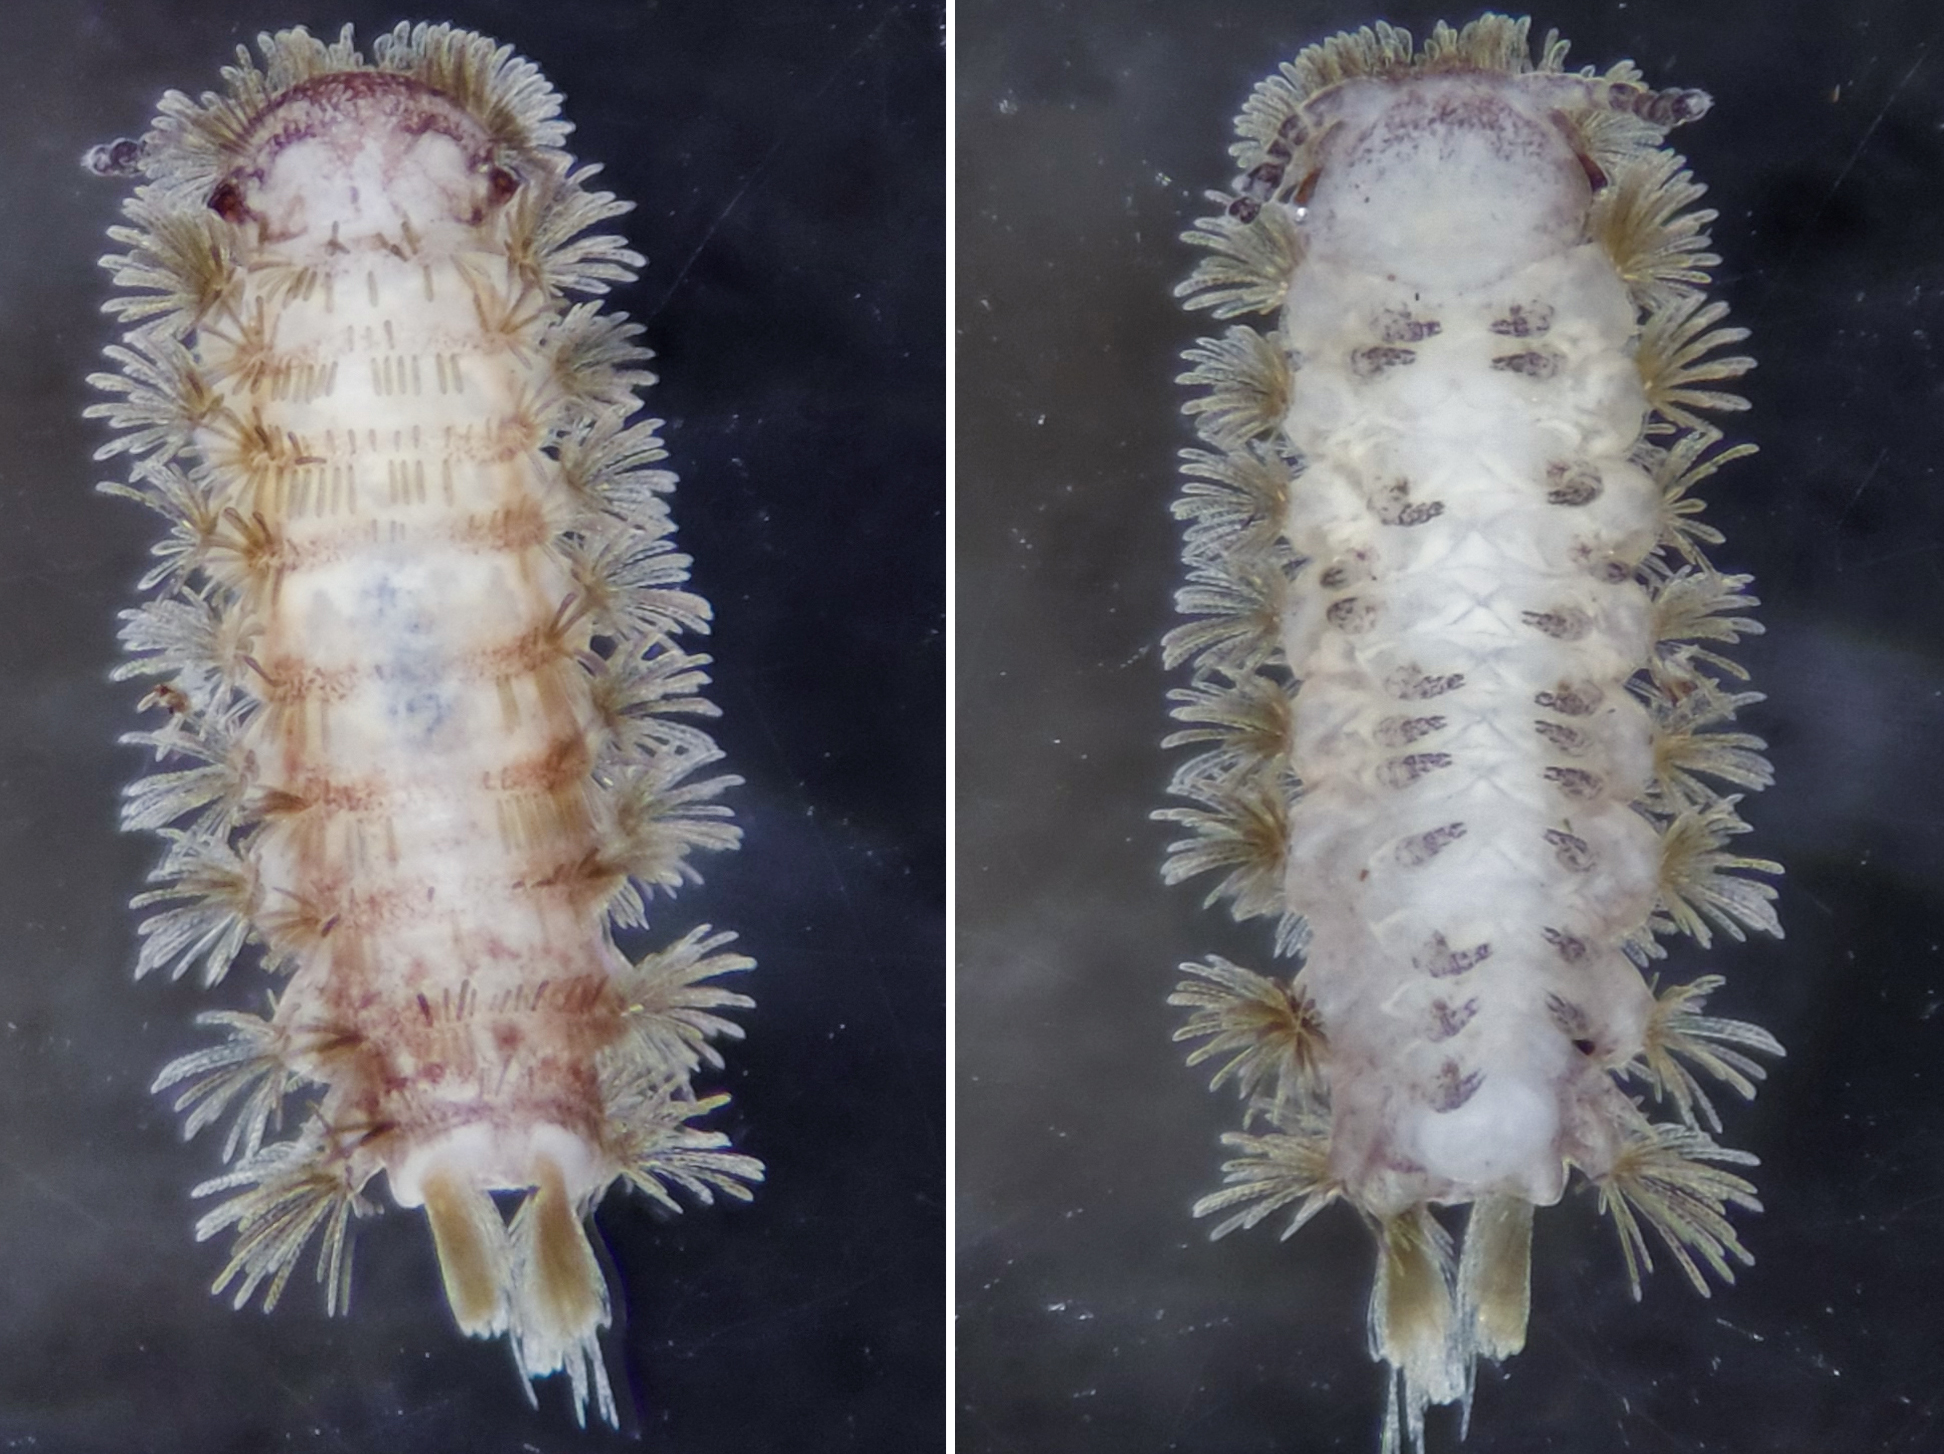
Dorsal (left) and ventral (right) views of Polyxenus millipede (Polyxenida: Polyxenidae) from Halifax County, Virginia.